<?xml version="1.0" encoding="utf-8"?><feed xmlns="http://www.w3.org/2005/Atom" ><generator uri="https://jekyllrb.com/" version="3.10.0">Jekyll</generator><link href="https://bartreardon.github.io/feed.xml" rel="self" type="application/atom+xml" /><link href="https://bartreardon.github.io/" rel="alternate" type="text/html" /><updated>2026-07-04T01:21:52+00:00</updated><id>https://bartreardon.github.io/feed.xml</id><title type="html">Stuff about things</title><subtitle>Random thoughts</subtitle><author><name>Bart Reardon</name></author><entry><title type="html">ContainerManager - a Mac app for Apple’s container tool</title><link href="https://bartreardon.github.io/2026/06/16/containermanager-a-mac-app-for-apples-container-tool.html" rel="alternate" type="text/html" title="ContainerManager - a Mac app for Apple’s container tool" /><published>2026-06-16T00:00:00+00:00</published><updated>2026-06-16T00:00:00+00:00</updated><id>https://bartreardon.github.io/2026/06/16/containermanager-a-mac-app-for-apples-container-tool</id><content type="html" xml:base="https://bartreardon.github.io/2026/06/16/containermanager-a-mac-app-for-apples-container-tool.html"><![CDATA[<p>I’ve been tinkering with Apple’s <a href="https://github.com/apple/container"><code>container</code></a> tool on and off since it was first announced a year ago and with the new features in the 1.0 release, I ended up building a GUI frontend for it and it’s called ContainerManager.</p>

<!--more-->

<h3 id="what-is-it">What is it</h3>

<p><a href="https://github.com/apple/container"><code>container</code></a> is Apple’s open source tool for running Linux containers on macOS (Apple silicon). It works like docker or podman, but it’s built on top of Apple’s virtualization framework and designed to integrate with the OS in a more native way. It recently reached it’s 1 year anniversary and 1.0 release.</p>

<p>v1.0 came with the <code>container machine</code> command (<a href="https://www.youtube.com/watch?v=Q2xD6zkDz-s">youtube link</a>), which lets you create and manage persistent Linux VMs. However, despite being very comfortable living in the terminal, I wanted a more visual way to explore and manage containers, machines, and images without having to remember all the CLI commands.</p>

<p>ContainerManager is a native macOS app that helps you interact with containers in a more visual way. It’s not a wrapper that shells out to the CLI, instead it links <code>container</code>’s own Swift client libraries and talks to the same background services directly, so the lists and actions are the same ones the <code>container</code> command uses under the hood. (It does still call the CLI for a few things: starting/stopping the services, building images, and opening a shell in Terminal.)</p>

<p><img src="/images/CM-Machines.png" alt="ContainerManager screenshot" /></p>

<h3 id="what-it-isnt">What it isn’t</h3>

<p>ContainerManager isn’t a full featured container management solution, it’s more of a playground for learning and exploring the <code>container</code> tool and how containers work on macOS. It’s not trying to be Docker Desktop or podman or anything like that, it’s just a way to interact with the Apple <code>container</code> tool in a more visual way. YYMV, caveat emptor, etc 🙂.</p>

<h3 id="what-it-does">What it does</h3>

<p>The day-to-day stuff, without reaching for the man pages:</p>

<ul>
  <li><strong>Machines</strong> - create and run persistent Linux VMs, edit their boot config, view logs, and drop into an integrated terminal (or Terminal.app) without leaving the app.</li>
  <li><strong>Containers</strong> - create, run, start/stop/kill, view logs, and exec into a shell.</li>
  <li><strong>Images</strong> - pull from a registry, <strong>build from a Dockerfile</strong> right in the app, and turn any image straight into a container or machine.</li>
  <li><strong>Networks</strong> and <strong>Volumes</strong> - the usual create / inspect / delete.</li>
  <li><strong>System</strong> - see whether the services are running and start/stop them, plus a bit of guided setup to get the <code>container</code> tool installed and its base environment sorted if it isn’t already.</li>
</ul>

<p><img src="/images/CM-Images.png" alt="ContainerManager image build screenshot" /></p>

<p><img src="/images/CM-Containers-Terminal.png" alt="ContainerManager terminal screenshot" /></p>

<h3 id="stacks">Stacks</h3>

<p><img src="/images/CM-Stacks.png" alt="ContainerManager stacks screenshot" /></p>

<p>“Stacks” is a feature that lets you stand up a few containers together as a unit (e.g. WordPress + a database) from a template or a custom builder, with the networking wired up for you. This isn’t a full compose implementation, but it’s something and let’s you get a multi-container setup running with a couple of clicks so you can explore how the containers interact with each other without having to write a bunch of CLI commands or YAML.</p>

<h3 id="requirements">Requirements</h3>

<ul>
  <li>Apple silicon Mac</li>
  <li>macOS 26</li>
  <li>v1.0.0 of the <code>container</code> tool installed (ContainerManager will offer to grab it for you if it’s missing)</li>
</ul>

<h3 id="how-to-get">How to Get</h3>

<p>It’s on GitHub: <a href="https://github.com/bartreardon/ContainerManager-App">bartreardon/ContainerManager-App</a>. Grab a build from the <a href="https://github.com/bartreardon/ContainerManager-App/releases">releases page</a>.</p>

<p>It’s early days - it works but expect a rough edge here and there.</p>

<p>Found a bug or have an idea? <a href="https://github.com/bartreardon/ContainerManager-App/issues">Open an issue</a>. 🙂</p>

<h3 id="ai-disclaimer">AI Disclaimer</h3>

<p>ContainerManager was created with the assistance of AI, specifically Claude (Fable, while it existed, otherwise Opus) using nothing but the base Pro plan, using a combination of the Claude app for planning and scaffolding and the Coding Assistant in Xcode for writing and debugging code.</p>

<h4 id="opinionated-opinion">Opinionated opinion</h4>

<p>This isn’t a post about AI however I feel that it’s important to be transparent about the tools I used to build ContainerManager. I used AI to help with some of the coding and debugging, but the design and overall direction of the app was me and was willed into existance because of my own ideas and desires. For me, AI isn’t a means to an end but a way to kickstart the process, something that I can often struggle with when turning my ideas into reality. I don’t buy into the hype, but this is a “force multiplier” (for want of a better term) for the way I work.</p>

<p>AI doesn’t replace human creativity, but it can be a useful tool to help with some of the more tedious or repetitive aspects that come with app development. I used it as a way to speed up the development process and get past roadblocks and help with documentation. As a tool for getting past all the donkey work, LLM’s are quite powerful. I say this with my own opinions that while LLM’s as a technoligy are facinating and, IMO, here to stay, how models are trained, source material and energy usage are real problems that exist today and need to be addressed. I don’t have the answers to those problems, but I think in time they are solvable. Time will tell, and hopefully RAM prices will drop.</p>]]></content><author><name>Bart Reardon</name></author><category term="ContainerManager" /><summary type="html"><![CDATA[I’ve been tinkering with Apple’s container tool on and off since it was first announced a year ago and with the new features in the 1.0 release, I ended up building a GUI frontend for it and it’s called ContainerManager.]]></summary></entry><entry><title type="html">Adding Wallpaper folders to macOS System Settings</title><link href="https://bartreardon.github.io/2025/12/04/adding-wallpaper-folders-to-macos-system-settings.html" rel="alternate" type="text/html" title="Adding Wallpaper folders to macOS System Settings" /><published>2025-12-04T00:00:00+00:00</published><updated>2025-12-04T00:00:00+00:00</updated><id>https://bartreardon.github.io/2025/12/04/adding-wallpaper-folders-to-macos-system-settings</id><content type="html" xml:base="https://bartreardon.github.io/2025/12/04/adding-wallpaper-folders-to-macos-system-settings.html"><![CDATA[<p>As an admin I like adding some brand flair to our macOS deployments. I also like giving end users the option to choose their flavour of flair (or none at all). When setting default desktop backgrounds there are tools and methods to get images installed, set, and made available.</p>

<p>In macOS 26 Tahoe, one of those broke.</p>

<!--more-->

<h3 id="tldr">TL;DR</h3>

<p>I wrote an app/swift package that lets you easily add a folder of images to System Settings -&gt; Wallpaper under macOS 26</p>

<p>It’s here <a href="https://github.com/bartreardon/WallpaperFolderManager">WallpaperFolderManager</a></p>

<p>If you’re interested to know why, read on</p>

<h3 id="simpler-times">Simpler Times</h3>

<p>For setting a desktop background there’s nothing easier than <a href="https://github.com/scriptingosx/desktoppr">desktoppr</a>. Install the package, give it a nice image and boom, background set. It does more than that of course. You should head over there and check it out.</p>

<p>If you want to dump a bunch of images on the drive so people can select a random one there are a couple of options:</p>

<h4 id="plonk-everything-into-librarydesktop-pictures">Plonk everything into <code>/Library/Desktop Pictures/</code></h4>

<p>This one is easy. Create <code>/Library/Desktop Pictures/</code> if it doesn’t exist then fill it with images.</p>

<p>The problem with this is the images appear in System Settings -&gt; Wallpaper -&gt; Pictures after all the built in pictures. To see any of them you have to click “Show All” and then scroll past all the included pictures before you get to your custom ones.</p>

<h4 id="edit-librarypreferencescomapplesystempreferencesplist">Edit <code>~/Library/Preferences/com.apple.systempreferences.plist</code></h4>

<p>This was a little more convoluted but still easy.</p>

<p>As a user you can add these yourself. In System Settings -&gt; Wallpaper, clicke the “Your Photos” -&gt; “Add Photo…” button, select “Choose Folder” and then select your folder of images. This places them in their own section at the bottom underneath the “Colours” section but they are at least visible with the folder name and preview of the images within.</p>

<p>From a script you could create this link by modifying the plist:</p>

<pre><code class="language-bash">/usr/libexec/PlistBuddy -c "Add :DSKDesktopPrefPane:UserFolderPaths: string '/opt/Org Name/Org Pictures'" ~/Library/Preferences/com.apple.systempreferences.plist
</code></pre>

<p>This adds an item to the nested <code>DSKDesktopPrefPane -&gt; UserFolderPaths</code> array.</p>

<pre><code>% defaults read ~/Library/Preferences/com.apple.systempreferences.plist
{
    ...
    DSKDesktopPrefPane =     {
        UserFolderPaths =         (
            "/opt/Org Name/Org Pictures"
        );
        VisibleAlbums =         (
        );
    };
    ...
}
</code></pre>

<p>The <code>defaults</code> command is relatively unwieldy for this so we use <code>PlistBuddy</code> instead. This works fine from macOS 13 to macOS 15.</p>

<h3 id="macos-26---because-why-do-things-the-simple-way">macOS 26 - Because why do things the simple way?</h3>

<p>In macOS 26 the configuration now lives in <code>~/Library/Containers/com.apple.wallpaper.extension.image/</code> with a bunch of embedded plists as data blobs and some other configuration and there is a daemon called <code>WallpaperAgent</code> looking after it. Unsure if this is new in macOS 26 but I’m aware of it now.</p>

<p>Managing the new config from a shell command using defaults or plistbuddy would be rather annoying at best as there is a lot to consider and get right. I know this becasue I initially tried to work out where the settings were changed so I could get our custom folder of desktop backgrounds working. Shout out to <a href="https://fsmonitor.com">FSMonitor</a> which gave some rather enlightening discoveries.</p>

<pre><code>When life gives you lemons, write a swift app
</code></pre>

<p>Enter <a href="https://github.com/bartreardon/WallpaperFolderManager">WallpaperFolderManager</a> (names are hard ok)</p>

<p>WallpaperFolderManager is a swift utility/package that handles all the work of creating the necessary files, plists, encoding etc required to be able to programatically add in a folder path to System Settings -&gt; Wallpaper. It will create the required config and then restart <code>cfprefsd</code> and <code>WallpaperAgent</code></p>

<p><em>Note: At the time of writing I’m not aware of any public API’s that hook in to container management. If there is one, let me know</em></p>

<h3 id="usage">Usage</h3>

<pre><code class="language-bash"># Add a folder
wallpaper-folder add ~/Pictures/Wallpapers

# Add a folder with verbose output
wallpaper-folder add ~/Pictures/Wallpapers --verbose

# Add a folder without restarting services
wallpaper-folder add ~/Pictures/Wallpapers --no-restart

# List registered folders
wallpaper-folder list

# List with verbose output (shows IDs and dates)
wallpaper-folder list --verbose

# Remove a folder
wallpaper-folder remove ~/Pictures/Wallpapers

# Show help
wallpaper-folder --help
wallpaper-folder add --help
</code></pre>

<h2 id="results">Results</h2>

<p>Before:</p>

<p><img width="350" alt="before" src="https://github.com/user-attachments/assets/58ae6d6e-bd2d-4738-a56d-b38c0686221c" /></p>

<p><br /></p>

<p>After: <code>% wallpaper-folder add ~/Pictures/My\ Pics</code></p>

<p><em>Note: Requires closing and re-openeing System Settings if it was open to read the new settings</em></p>

<p><img width="350" alt="after" src="https://github.com/user-attachments/assets/2dbb9670-35b7-4650-8330-45afb775f136" /></p>

<h2 id="caveats">Caveats</h2>

<p>I’ve tested this on macOS 15 and macOS 26. It <em>should</em> work on macOS 13 and 14 but I haven’t tried. On the older OS’s it falls back to modifying the <code>com.apple.systempreferences</code> which is (AFAIK) the same on macOS 13-&gt;15</p>

<p>It doesn’t support macOS 12 or earlier (and neither should you)</p>

<h2 id="how-to-get">How to Get</h2>

<p>Go to the <a href="https://github.com/bartreardon/WallpaperFolderManager/releases">releases page</a></p>

<p>There is a signed and notarized pkg (installs to <code>/usr/local/bin</code>) or standalone binary</p>

<p>It is also availabe as a swift package if you want to include this functionality in your own app. Simply add to your <code>Package.swift</code>:</p>

<pre><code class="language-swift">dependencies: [
    .package(url: "https://github.com/bartreardon/WallpaperFolderManager.git", from: "1.0.0")
]
</code></pre>]]></content><author><name>Bart Reardon</name></author><category term="macOS" /><summary type="html"><![CDATA[As an admin I like adding some brand flair to our macOS deployments. I also like giving end users the option to choose their flavour of flair (or none at all). When setting default desktop backgrounds there are tools and methods to get images installed, set, and made available. In macOS 26 Tahoe, one of those broke.]]></summary></entry><entry><title type="html">New Release - Outset 4.2.0</title><link href="https://bartreardon.github.io/2025/08/05/new-release-outset-4.2.0.html" rel="alternate" type="text/html" title="New Release - Outset 4.2.0" /><published>2025-08-05T00:00:00+00:00</published><updated>2025-08-05T00:00:00+00:00</updated><id>https://bartreardon.github.io/2025/08/05/new-release---outset-4.2.0</id><content type="html" xml:base="https://bartreardon.github.io/2025/08/05/new-release-outset-4.2.0.html"><![CDATA[<p><img src="https://github.com/macadmins/outset/raw/78002def008bea2a51f793e0cd033fe71ff81c9b/Outset/Assets.xcassets/AppIcon.appiconset/Outset.png_128x128.png?raw=true" alt="The Outset app icon" /></p>

<p>Today I pushed a new release of Outset with a couple of neat new features</p>

<p>Get it at <a href="https://github.com/macadmins/outset/releases">https://github.com/macadmins/outset/releases</a></p>

<!--more-->

<h3 id="what-is-outset">What is Outset?</h3>

<p>If you’re new, Outset is a utility application which automatically processes scripts and packages during the boot sequence, user logins, or on demand. It is as alternative to creating and deploying custom launchd plists for a subset of common use cases, namely device start and user login events. Outset 4 is a swift rewrite of the origional which was written in python. It is maintained and released under <a href="https://macadmins.io">Mac Admins Open Source</a></p>

<p>A while ago it was suggested we could add support for outset to run scripts deployed from a config profile. This required a bit of thought to implement in a nice way but I think what we have should work for most use cases.</p>

<p>Some considerations that were made:</p>

<ul>
  <li>Profile delivered scripts should disable local scripts</li>
  <li>Scripts should not be directly exposed in the UI</li>
  <li>Support for multiple profiles to enable conditional profile (and therefore conditional scripts) for MDM’s that have that capability</li>
</ul>

<h3 id="script-security">Script security</h3>

<p>The first point has a similar function to deploying a profile with a <a href="https://github.com/macadmins/outset/wiki/Security#file-verification-optional">shasum</a> of local scripts in that the presence of the config item disables scripts not identified from running. As a security feature this is useful to effectively disable local script execution. In addition, this is only supported for MDM delivered profiles. Payloads added to local preferences are ignored (except when using <code>--debug</code> which is intended for testing)</p>

<p>So that scripts are not direcetly visible in the macOS UI, the script is base64 encoded and deployed as data. In System Settings -&gt; General -&gt; Device Management this will appear something like this:</p>

<pre><code>"login-every" =
{
"Test Script" = {length = 96, bytes
= 0x49794576 596d6c75 4c33707a 61416/4b ... 62475569 43676f3d};
};
</code></pre>

<p>Reading the contents using <code>defaults</code> returns</p>

<pre><code>% defaults read /Library/Managed\ Preferences/io.macadmins.Outset.plist
{
    "script_payloads" =     {
        "login-every" =         {
            "Test Script" = {length = 96, bytes = 0x49794576 596d6c75 4c33707a 61416f4b ... 62475569 43676f3d };
        };
    };
}
</code></pre>

<p>This should protect script content from casual observers however absolute security cannot be guaranteed and determined individuals will still be able to discover the complete base64 encoded string and decode it.</p>

<h3 id="multiple-profile-support">Multiple profile support</h3>

<p>Supporting multiple profiles was tricky. macOS will happily load multiple profiles for the same preference domain but if two profiles contain the same parent key then at best, only one will load but I believe the behaviour is undefined. To get around this, profiles can be created with custom parent keys, prefixed with <code>script_payloads</code>.</p>

<p>This means you can have a single profile with <code>script_payloads</code> or multiple payloads each with a custom keyname, e.g. <code>script_payloads_testers</code>, <code>script_payloads_common</code>, <code>script_payloads_VIP</code> etc and deploy one or ore of these to devices as needed.</p>

<p>More details are available in the <a href="https://github.com/macadmins/outset/wiki/Payloads">Payloads page</a> on the Outset wiki.</p>

<p>One drawback from this method though is that tools like <a href="https://github.com/ProfileCreator/ProfileCreator">ProfileCreator</a> and <a href="https://imazing.com/profile-editor">iMazing Profile Editor</a> or Jamf Pro custom schemas will not be able to support arbitary payload keys (apart from that, Jamf Pro Custom Schemas don’t support <code>data</code> as an object type which makes it impossible to use for script payloads). I’ll be looking at the <a href="https://github.com/ProfileManifests/ProfileManifests">Profile Manifests project</a> to see if there is a compromise that can be made here.</p>

<h2 id="what-next">What next?</h2>

<p>Outset will continue to be maintained to make sure it is current and works on modern versions of macOS in an expected way.</p>

<p>If you have any feedback, feature requests or have notices a bug or issue, please <a href="https://github.com/macadmins/outset/issues/new/choose">create an issue</a> on the Outset github project page</p>

<p>You can also come chat in the <code>#outset</code> channel in the <a href="https://www.macadmins.org">MacAdmins Slack</a> 🙂</p>]]></content><author><name>Bart Reardon</name></author><category term="Outset" /><summary type="html"><![CDATA[Today I pushed a new release of Outset with a couple of neat new features Get it at https://github.com/macadmins/outset/releases]]></summary></entry><entry><title type="html">Using the new API for Apple Business/School Manager</title><link href="https://bartreardon.github.io/2025/06/11/using-the-new-api-for-apple-business-school-manager.html" rel="alternate" type="text/html" title="Using the new API for Apple Business/School Manager" /><published>2025-06-11T00:00:00+00:00</published><updated>2025-06-11T00:00:00+00:00</updated><id>https://bartreardon.github.io/2025/06/11/using-the-new-api-for-apple-business-school-manager</id><content type="html" xml:base="https://bartreardon.github.io/2025/06/11/using-the-new-api-for-apple-business-school-manager.html"><![CDATA[<p>WWDC 2025 brings a long awaited and exciting new feature to ABM/ASM.</p>

<p>🎉 An API 🎉</p>

<p>I’m still catching up on WWDC news but as this one ticks a huge box for my workloads, here’s the quickest of quick start guides …</p>

<!--more-->

<p><em>From now on I’m going to use the term <strong>ABM</strong> to refer to both Apple Business Manager and Apple School Manager</em></p>

<p>Source documentation can be found at on the <a href="https://developer.apple.com/documentation/apple-school-and-business-manager-api">Apple School and Business Manager API</a> developer web page and contains comprehensive information on what API’s are available. You should read that to get all the details on the features that have been added.</p>

<h3 id="quick-start">Quick Start</h3>

<hr />
<h4 id="1---creating-an-api-key">1 - Creating an API key</h4>

<ul>
  <li>Log on to your ABM</li>
  <li>On the bottom left, click your name and select “Preferences”</li>
  <li>
    <p>There should be a new section in your profile called “API”. Click on that</p>

    <p><img src="/images/api.png" alt="API" /></p>
  </li>
  <li>
    <p>You will see a list of API accounts (or none if you don’t have any already). Click the “+” button to create a new API Account</p>

    <p><img src="/images/api_plus_button.png" alt="API Plus" /></p>
  </li>
  <li>
    <p>Give your API a new label, e.g. “My API”, then click “Create”</p>

    <p><img src="/images/create_api.png" alt="Create API" /></p>
  </li>
  <li>Click the “Generate Private Key” button. The new key will be created and downloaded.
    <ul>
      <li><strong>Note:</strong> This key is private and should not be shared. Keep it safe. You can’t re-download it but you can revoke it and create a new API key.</li>
    </ul>

    <p><img src="/images/generate_key.png" alt="Generate Key" /></p>
  </li>
</ul>

<hr />
<h4 id="2---getting-your-details">2 - Getting your details</h4>

<p>Once created, your new API account will appear in the lsit of accounts. You can create more than one.</p>

<p>Click “Manage” to see the relevant details you will need, namely:</p>

<p><img src="/images/manage.png" alt="API Manage" /></p>

<ul>
  <li>Key ID</li>
  <li>Client ID</li>
</ul>

<p><img src="/images/api_deets.png" alt="API Deets" /></p>

<p>Write these down for the next step, but you can get them at any time from this section.</p>

<hr />
<h4 id="3---using-the-key-to-create-a-client-assertion">3 - Using the key to create a Client Assertion</h4>

<p>Unlike other API’s where you encode some account credentials and then request a bearer token, Apple requires you create a JSON web token (JWT) using your API Key. Details on how to do this are on the <a href="https://developer.apple.com/documentation/apple-school-and-business-manager-api/implementing-oauth-for-the-apple-school-and-business-manager-api">Implementing OAuth for the Apple School and Business Manager API</a> page.</p>

<p>Apple provide a handy python script you can use to generate the client assertion. If you are using this on macOS you will need the following:</p>

<ul>
  <li>Python 3 (installed if you have xcode or command line tools installed)</li>
  <li>authlib library</li>
  <li>Crypto library</li>
</ul>

<p>Copy and save locally as <code>create_client_assertion.py</code></p>

<p>To get the two required librariues you can run the following:</p>

<pre><code class="language-bash">pip3 install authlib PyCryptodome
</code></pre>

<p>Don’t install <code>crypto</code> or <code>pycrypto</code> as those don’t have <code>ECC</code> which is required in the Apple python script.</p>

<p>update the following with the values that you got earlier from your API account:</p>

<pre><code class="language-python">private_key_file = "private-key.pem"
client_id = "BUSINESSAPI.9703f56c-10ce-4876-8f59-e78e5e23a152"
team_id = "BUSINESSAPI.9703f56c-10ce-4876-8f59-e78e5e23a152"
key_id = "d136aa66-0c3b-4bd4-9892-c20e8db024ab"
</code></pre>

<h4 id="zsh-script">ZSH Script:</h4>

<p>If you don’t want to use python, I’ve ported the script to zsh as <a href="https://github.com/bartreardon/macscripts/blob/master/AxM/create_client_assertion.sh">create_client_assertion.sh</a></p>

<p>It works exactly the same as the python script. You can pass in your client id and private key or hard code them in.</p>

<h4 id="creating-the--client-assertion">Creating the  client assertion:</h4>

<p>To create your client assertion file, place your private key in the same folder as your script and run:</p>

<p>python:</p>
<pre><code class="language-bash">python3 create_client_assertion.py
</code></pre>

<p>zsh:</p>
<pre><code class="language-bash">./create_client_assertion.sh 
# or if your values aren't hard coded
./create_client_assertion.sh "path_to_key.pem" "&lt;client_id&gt;" "&lt;key_id&gt;"
# where path_to_key.pem is your private key
# and &lt;client_id&gt; and &lt;key_id&gt; are your values from ABM
</code></pre>

<p>You should get a file <code>client_assertion.txt</code> with contents that looks something like:</p>

<blockquote>
  <p>eyJhbGciOiJFUzI1NiIsImtpZCI6ImQxMzZhYTY2LTBjM2ItNGJkNC05ODkyLWMyMGU4ZGIwMjRhYiIsInR5cCI6IkpXVCJ9.eyJzdWIiOiJCVVNJTkVTU0FQSS45NzAzZjU2Yy0xMGNlLTQ4NzYtOGY1OS1lNzhlNWUyM2ExNTIiLCJhdWQiOiJodHRwczovL2FjY291bnQuYXBwbGUuY29tL2F1dGgvb2F1dGgyL3YyL3Rva2VuIiwiaWF0IjoxNzQ5NjI5MTEwLCJleHAiOjE3NjUxODExMTAsImp0aSI6IkZBODBGMzI1LTk1NUMtNDIzMy04NDIyLUM0ODBERDEzNjc5RSIsImlzcyI6IkJVU0lORVNTQVBJLjk3MDNmNTZjLTEwY2UtNDg3Ni04ZjU5LWU3OGU1ZTIzYTE1MiJ9.cM4boKJ8xvLeN0fiMEDLeCdxyVizQuHLucuGaUAo5w7aeyhIgvug7tmnDxJwiS0AdRYW8FY7Lu97ufmYSGhKmQ</p>
</blockquote>

<p>This will be valid for 180 days so you don’t need to run this process every time you want to use the ABM API.</p>

<h4 id="4-accessing-the-api">4 Accessing the API</h4>

<p>Finally - seems like we’ve done a lot so far but we’re at the business end now.</p>

<p>Once you have your client assertion you can use it to generate a bearer token and then start fetching data from ABM.</p>

<pre><code class="language-bash">#!/bin/zsh

# Client assertion
client_assert="nQuYXBwbGUuY29tL2F1dGg...etc...RYW8FY7Lu97ufmYSGhKmQ"
# Client ID from API Account
client_id="BUSINESSAPI.9703f56c-10ce-4876-8f59-e78e5e23a152"

# make the request
request_json=$(curl -s -X POST \
-H 'Host: account.apple.com' \
-H 'Content-Type: application/x-www-form-urlencoded' \
"https://account.apple.com/auth/oauth2/token?grant_type=client_credentials&amp;client_id=${client_id}&amp;client_assertion_type=urn:ietf:params:oauth:client-assertion-type:jwt-bearer&amp;client_assertion=${client_assert}&amp;scope=business.api")

# &lt;insert validation checking here&gt;

# presuming everything worked
ACCESS_TOKEN=$(echo $request_json | jq -r '.access_token')

## Fetch all organisational devices:
curl "https://api-business.apple.com/v1/orgDevices" -H "Authorization: Bearer ${ACCESS_TOKEN}"
</code></pre>

<p>Presuming the client assertion process worked you should now see a json representation of your devices from ABM as described in the <a href="https://developer.apple.com/documentation/applebusinessmanagerapi/get-org-devices">API reference documentation</a></p>

<p>The access token will be valid for 1 hour after creation after which it will expire and you will need to create a new one if needed.</p>

<p>For more comprehensive details, do go and read Apple’s official documentation:
<a href="https://developer.apple.com/documentation/applebusinessmanagerapi">https://developer.apple.com/documentation/applebusinessmanagerapi</a></p>

<h1>🙂</h1>]]></content><author><name>Bart Reardon</name></author><category term="Apple" /><summary type="html"><![CDATA[WWDC 2025 brings a long awaited and exciting new feature to ABM/ASM. 🎉 An API 🎉 I’m still catching up on WWDC news but as this one ticks a huge box for my workloads, here’s the quickest of quick start guides …]]></summary></entry><entry><title type="html">Playing Nice</title><link href="https://bartreardon.github.io/2025/04/23/playing-nice.html" rel="alternate" type="text/html" title="Playing Nice" /><published>2025-04-23T00:00:00+00:00</published><updated>2025-04-23T00:00:00+00:00</updated><id>https://bartreardon.github.io/2025/04/23/playing-nice</id><content type="html" xml:base="https://bartreardon.github.io/2025/04/23/playing-nice.html"><![CDATA[<p><img src="/images/nice-agents.png" alt="Nice Agents" /></p>

<p>I’ve written about issues with <a href="https://bartreardon.github.io/2022/05/19/on-the-topic-of-deploying-a-multitude-of-system-agents.html">deploying too many system agents</a> before but in a managed environment some things are unavoidable. We can do some things to make them better behaved though, and ensure that usability of the system by the human at the keyboard is prioritised over other processes.</p>

<!--more-->

<p>The main issue is that a lot of agents install with default performance settings and as such, will compete for system resources on equal footing with user apps and other processes.</p>

<p>A greedy system agent might want to wake up on a certain schedule and consume as much CPU as it can before going back to sleep. While running, CPU usage can spike, the system can become sluggish and the user experience can become degraded.</p>

<p>As a sysadmin, we want to balance system performance so we can meet any security or management requirements while minimising the impact to the end user trying to actually do work.</p>

<h2 id="what-is-nice">What is Nice</h2>

<p>Nice, in BSD terms, is a property that informs the OS how “nice” the process should be to other processes on the system when it comes to system resources like CPU usage. This can range from -20 to +20. If unset, the default is 0.</p>

<p>https://www.manpagez.com/man/3/nice/</p>

<p>The higher the value, the “more nice” a process can be with regard to giving up resources to higher priority tasks. Given a limited resource, macOS will prioritise processes with lower (i.e. less “nice”) nice values.</p>

<p>Note that this does <strong><em>not</em></strong> limit the resources a process can use, only how the process is scheduled by the OS. If a process wants to use 100% CPU and 100% of CPU is available then the OS will allocate it. If a higher priority task comes along though then resources will be re-allocated as required.</p>

<p>From a sysadmin perspective, this means you can set the nice property on running system agents and let the OS manage the resources, so for example if your video conference app has a higher priority than your inventory collection daemon, the latter won’t interfere as much as it would if they both had the same priority, but if the system is idle, the system agent will be able to ramp up and complete its tasks.</p>

<h2 id="making-a-process-behave-nicely">Making a process behave nicely</h2>

<p>launchd has a property in the agent/daemon plist that can set this:</p>

<pre><code class="language-xml">&lt;key&gt;Nice&lt;/key&gt;
&lt;integer&gt;5&lt;/integer&gt;
</code></pre>

<p>…however most of the time you don’t want to be maintaining this directly for third party launchd plists (although you can if that’s what you really want to do). Instead we can use the <code>renice</code> command to set the nice property of an existing process like so:</p>

<pre><code class="language-bash">pid=$(pgrep -f "$PROCESS_NAME")
renice +20 -p "$pid"
</code></pre>

<p>This will set the nice property of the identified process to the highest value and nearly every other process on the system will take precedence. If you have particularly resource hungry processes, this can improve user experience in the UI quite a bit, while letting the system agent do its thing. The nice value will also applies to any child processes the agent might spawn.</p>

<p>You can validate the nice value of a running process by running:</p>

<pre><code class="language-bash">ps -o ni= -p "$pid"
</code></pre>

<p><strong>Disclaimer:</strong> Running <code>renice</code> on third party software should have no issues but you should verify that doing so doesn’t have any adverse effects on how the software needs to operate. Testing and validation is very much recommended.</p>

<p><em>The last time <code>renice</code> was mentioned on the <a href="https://www.macadmins.org">MacAdmins Slack</a> was in 2019 so I figured it was worth blogging about.</em></p>

<h2 id="limiting-cpu-resources">Limiting CPU resources</h2>

<p>While we can’t set CPU resources directly, like “use 10% CPU only” we can limit the process on Apple Silicon macs to run on efficiency cores only. Howard Oakley has a great writeup on that on the <a href="https://eclecticlight.co/2022/10/20/making-the-most-of-apple-silicon-power-5-user-control/">Eclectic Light Company blog</a></p>

<p>To do this we can use the <code>taskpolicy</code> command like so:</p>

<pre><code class="language-bash">taskpolicy -b -p "$pid"
</code></pre>

<p>This will limit the process to running on efficiency cores only, further improving resource utalisation for low priority tasks.</p>

<h2 id="tying-things-together">Tying things together</h2>

<p>Here is a script that can perform all the above. It takes a process name as an argument and optionally a nice value in the range of -20 to +20. (<a href="https://github.com/bartreardon/macscripts/blob/master/macos/renice-process.sh">link</a>)</p>

<p>This would need to run after the system has booted and agents are running. An option would be to use this with an <a href="https://github.com/macadmins/outset">Outset</a> <code>login-privileged-every</code> task, but could also run from an MDM or other device management framework automatically or on request.</p>

<pre><code class="language-bash">#!/bin/bash

# Script to renice processes.

# Author: Bart Reardon
# Date: 2025-04-24
# Version: 1.0

## Description:
# This sets the priority of processes to the specified value.
# It will check for the process every 60 seconds and renice it if found.
# If the process is not found, it will retry for a maximum of 10 times.
# If the process is not found after 10 retries, it will exit with an error.
# Log output is written to /var/log/renice-&lt;process_name&gt;.log

# Usage: ./renice-process.sh &lt;process_name&gt; [nice_value]
# Example: ./renice-process.sh 'MyProcess' +10

# Process name will match any process name that contains the string.
# For example, if the process name is 'MyProcess', it will match 'MyProcess', 'MyProcess2', 'MyProcess3', etc.


PROCESS_NAME="$1"
NICE_VALUE="${2:-+10}" # Default to +20 if not provided
# If using in a jamf script:
# PROCESS_NAME="$4"
# NICE_VALUE="${5:-+10}" # Default to +20 if not provided

# Constants
RETRY_INTERVAL=60 # seconds
MAX_RETRIES=10 # maximum number of retries
TOTAL_RUNTIME=600 # seconds (10 minutes)
START_TIME=$(date +%s)

print_usage() {
    echo "Usage: $0 &lt;process_name&gt; [nice_value]"
    echo "Example: $0 'MyProcess' +10"
}

# check if running as root
if [ "$(id -u)" -ne 0 ]; then
    echo "This script must be run as root. Please run with sudo."
    exit 1
fi
# check PROCESS_NAME is not empty
if [ -z "$PROCESS_NAME" ]; then
    echo "Process name is required."
    print_usage
    exit 1
fi
# NICE_VALUE needs to be in the range -20 to +20
if ! [[ "$NICE_VALUE" =~ ^[-+]?[0-9]+$ ]] || [ "$NICE_VALUE" -lt -20 ] || [ "$NICE_VALUE" -gt 20 ]; then
    echo "nice_value must be an integer between -20 and +20."
    print_usage
    exit 1
fi

# log file
LOG_FILE="/var/log/renice-${PROCESS_NAME}.log"
# Create log directory if it doesn't exist
mkdir -p "$(dirname "$LOG_FILE")"

write_log() {
  local message="$1"
  # echo to stdout
  echo "$message"
  # echo to log file
  echo "$(date +'%Y-%m-%d %H:%M:%S') - $message" &gt;&gt; "$LOG_FILE"
}

# Function to renice  processes
renice_process() {
    pids=$(pgrep -f "$PROCESS_NAME")

    if [ -n "$pids" ]; then
        # echo to stderr to avoid confusion with stdout
        write_log "Found one or more processes for ${PROCESS_NAME}:"
        for pid in $pids; do
            write_log "Evaluating $(get_process_name "$pid") with PID $pid"
            # Check if the process is already reniced to the desired value
            if [[ $(get_nice_value "$pid") -eq "$NICE_VALUE" ]]; then
                write_log "Process $pid already has nice value of ${NICE_VALUE}. Skipping..."
                continue
            fi
            /usr/bin/renice ${NICE_VALUE} -p "$pid"
            /usr/sbin/taskpolicy -b -p "$pid"
            write_log "Reniced process $pid to ${NICE_VALUE} priority and limit to E cores only"
        done
        return 0
    else
        return 1
    fi
}

# Return the current nice value of a given PID
get_nice_value() {
    ps -o ni= -p "$1"
}

# Return process name of a given PID
get_process_name() {
    ps -o comm= -p "$1"
}

# Main loop
retry_count=0
write_log "Starting renice script..."
while true; do
    CURRENT_TIME=$(date +%s)
    ELAPSED_TIME=$((CURRENT_TIME - START_TIME))

    if [ "$ELAPSED_TIME" -ge "$TOTAL_RUNTIME" ]; then
        echo "Maximum runtime (10 minutes) exceeded.  Exiting."
        exit 1
    fi

    renice_process
    return_code=$?

    if [[ $return_code == 0 ]]; then
        echo "${PROCESS_NAME} process reniced successfully."
        break
    else
        echo "${PROCESS_NAME} process not found. Retrying in $RETRY_INTERVAL seconds..."
        sleep "$RETRY_INTERVAL"
        retry_count=$((retry_count + 1))

        if [ "$retry_count" -ge "$MAX_RETRIES" ]; then
            echo "Maximum retries reached. Exiting."
            exit 1
        fi
    fi
done
</code></pre>

<h2 id="extra-credit">Extra Credit</h2>

<p>If we were talking about a Linux system using systemd, we can be quite explicit about setting process priority and resource limitations.</p>

<p>For example for a systemd process <code>foo</code> we can create an override that is persistant and sets the values we want:</p>

<pre><code class="language-bash">sudo systemctl edit foo
</code></pre>

<p>will create <code>/etc/systemd/system/foo.service.d/override.conf</code></p>

<p>In that we can say something like:</p>

<pre><code class="language-ini">[Service]
CPUWeight=5
CPUQuota=10%
</code></pre>

<p>And the process, and child tasks, will be hard limited to 10% utilisation.</p>

<p>If only this type of override were possible in launchd, but unfortunatly for us, it’s not 🙂 (that I’m aware of - very happy to be corrected)</p>]]></content><author><name>Bart Reardon</name></author><category term="macOS" /><summary type="html"><![CDATA[I’ve written about issues with deploying too many system agents before but in a managed environment some things are unavoidable. We can do some things to make them better behaved though, and ensure that usability of the system by the human at the keyboard is prioritised over other processes.]]></summary></entry><entry><title type="html">Script compacting script</title><link href="https://bartreardon.github.io/2025/04/10/script-compacting-script.html" rel="alternate" type="text/html" title="Script compacting script" /><published>2025-04-10T00:00:00+00:00</published><updated>2025-04-10T00:00:00+00:00</updated><id>https://bartreardon.github.io/2025/04/10/script-compacting-script</id><content type="html" xml:base="https://bartreardon.github.io/2025/04/10/script-compacting-script.html"><![CDATA[<p><img src="https://apse2.ics.services.jamfcloud.com/icon/hash_4a31e987a578922e7f985624101b4d8811411119fba759fef6a453d4eb9d17dc" alt="Image" /></p>

<p>I was thinking recently about very large shell scripts and ways to make them more compact for use in Jamf or other MDM’s for macOS.</p>

<p>So I nerd sniped myself made a script that compacts other scripts.</p>

<!--more-->

<h3 id="why">Why</h3>

<p>This came to mind when working with <a href="https://github.com/installomator/Installomator/">Installomator</a> which in version 10.8 is 517Kb in size and over 11k lines long.</p>

<p>This isn’t a problem in reality but things like the inline editor in the Jamf Pro UI tend to choke on stuff like this. Large scripts aren’t <em>that</em> uncommon in this context but half a meg is pretty large. Not that compressing and encoding the script helps any since the resulting data is pretty uneditable.</p>

<h3 id="how">How</h3>

<p>The solution I came up with is pretty simple:</p>

<ul>
  <li>Use bzip2 compression at level 9 to compress the entire script</li>
  <li>Use base64 encoding to convert the compressed data to ascii</li>
  <li>Store the data as a blob in another script that performs the decompression and execution</li>
</ul>

<p>Initially I did this by moving things into and out of temp files but that has the potential to leave junk behind if something doesn’t work as you would expect and cleanup doesn’t happen but fortunatly we can do everything with pipes.</p>

<p>Creating the data representation of the target script is pretty easy and we can use <code>bzcat</code> to do the compression and pass the result to <code>base64</code> to encode:</p>

<pre><code>data=$(/usr/bin/bzcat -zk9 "$inputFile" | /usr/bin/base64 -w120)
</code></pre>

<p>Once we have that, we just do the reverse and execute. This can be done as a one liner:</p>

<pre><code># base64 decode the data blob
# pipe through to bzcat to decompress
# pipe through to a zsh subshell with any arguments

/usr/bin/base64 -d -o - &lt;&lt;&lt; "$data" | /usr/bin/bzcat | /bin/zsh -s "$@"
</code></pre>

<p>This worked pretty well and in the case of the Installomator script reduced from 517Kb, 11,179 line file to 122Kb, 1038 lines.</p>

<h3 id="where">Where</h3>

<p>Here’s my script that takes another script as an argument and creates the compacted version, ready to run.</p>

<p><a href="https://github.com/bartreardon/macscripts/blob/master/scripting/compress_script.sh">compress.sh</a></p>

<pre><code>#!/bin/zsh

# compress a script into a bzip2 compressed base64 encoded blob

inputFile="$1"
outputFile="$2"
if [ -z "$inputFile" ]; then
    echo "Usage: $0 &lt;input-file&gt; [&lt;output-file&gt;]"
    exit 1
fi
if [ -z $outputFile ]; then
    outputFile="${inputFile%.*}.bz2.sh"
fi
filedata=$(/usr/bin/bzcat -zk9 "$inputFile" | /usr/bin/base64 -w120)

scriptData=$( cat &lt;&lt;-EOF
#!/bin/zsh

# This is a bzip2 compressed base64 encoded script of ${inputFile}
# that will be decoded and executed in a subshell.

data="${filedata}"

/usr/bin/base64 -d -o - &lt;&lt;&lt; "\$data" | /usr/bin/bzcat | /bin/zsh -s "\$@"
EOF
)

# write the script to the output file
echo "$scriptData" &gt; "$outputFile"
chmod +x "$outputFile"
echo "Created compressed script: $outputFile"
</code></pre>

<h3 id="conclusion">Conclusion</h3>

<p>Is this useful? Who knows. Maybe some scripts will hit a limit of what can be stored or delivered using MDM processes or maybe you just want to obfuscate the contents of a script or protect it from modification.</p>

<p>This was created more as a thought exercise but maybe someone has a use for it. There’s no harm in putting this out there and just the process of thinking about a problem and finding a solution is a neat thing to do.</p>

<h3 id="related">Related</h3>

<p>Speaking of scripts that may or may not have any utility but were fun to think about and create, this is my script for creating <a href="https://github.com/bartreardon/macscripts/blob/master/scripting/create_self_extracting_script.sh">self extracting scripts</a> that extract themselves to a given target location.</p>

<p>Maybe useful if you need to install a script somewhere but can’t (or don’t want to) create a .pkg to do the deployment for you.</p>]]></content><author><name>Bart Reardon</name></author><category term="Scripting" /><summary type="html"><![CDATA[I was thinking recently about very large shell scripts and ways to make them more compact for use in Jamf or other MDM’s for macOS. So I nerd sniped myself made a script that compacts other scripts.]]></summary></entry><entry><title type="html">Migrating from wordpress to github</title><link href="https://bartreardon.github.io/2024/10/09/migrating-from-wordpress-to-github.html" rel="alternate" type="text/html" title="Migrating from wordpress to github" /><published>2024-10-09T00:00:00+00:00</published><updated>2024-10-09T00:00:00+00:00</updated><id>https://bartreardon.github.io/2024/10/09/migrating-from-wordpress-to-github</id><content type="html" xml:base="https://bartreardon.github.io/2024/10/09/migrating-from-wordpress-to-github.html"><![CDATA[<p>🎉 <strong>First Post</strong></p>

<p>At least a first post hosted on github.io (for as long as the <a href="https://www.computerworld.com/article/3552692/is-the-io-top-level-domain-headed-for-extinction.html">.io TLD still exists</a>)</p>

<p>Every other post on this site was migrated over from wordpress. Issues <a href="https://www.theverge.com/2024/10/4/24262410/wordpress-fight-trademarks-open-source-mullenweg#">over there</a> as well as the fact that I created this github.io 3 years ago with the intention of using it make for a good time to do this.</p>

<!--more-->

<h3 id="step-1---exporting-everything-from-wordpress">Step 1 - Exporting everything from wordpress</h3>

<p>This is relatively easy.</p>

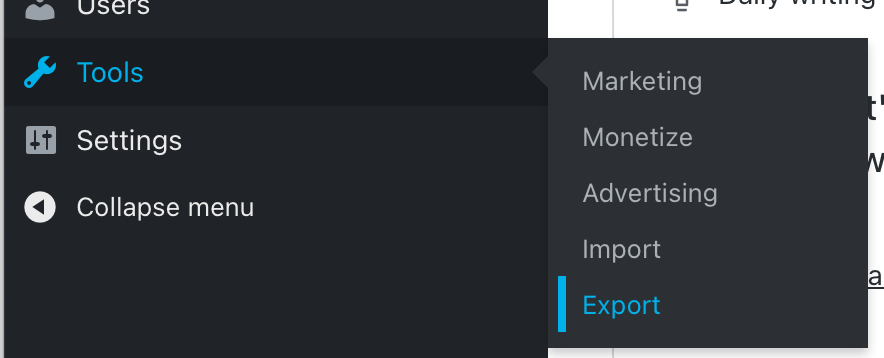
<p>Log on to wordpress, Tools -&gt; Export and then select “Export All”</p>

<p><img src="/images/wp1.png" width="300px" /></p>

<p><img src="/images/wp2.png" width="300px" /></p>

<p>You will then get a download of your site as an XML file called <code>yoursitename.wordpress.2024-10-08.000.xml</code> or something to that effect</p>

<h3 id="step-2---converting-everything-to-markdown">Step 2 - Converting everything to markdown</h3>

<p>This is also relatively easy (everything here was run under macOS 15)</p>

<ul>
  <li>Install <a href="https://brew.sh">brew</a></li>
  <li>run <code>brew install node.js</code></li>
  <li>rename your wordpress xml to <code>export.xml</code> and put it in a handy folder somewhere</li>
  <li>cd to the folder where your <code>export.xml</code> file is and run <code>npx wordpress-export-to-markdown --post-folders=false --prefix-date=true</code>
    <ul>
      <li>follow the bouncing ball. this will create a folder called <code>Output</code> and all your posts and images will be downloaded and converted to markdown format</li>
    </ul>
  </li>
</ul>

<h3 id="step-3---moving-it-all-to-githubio">Step 3 - Moving it all to github.io</h3>

<p>This one will take some finessing. I followed Chad Baldwin’s post <a href="https://chadbaldwin.net/2021/03/14/how-to-build-a-sql-blog.html">here</a> which if you follow will create a <code>https://yourname.github.io</code> site using the <code>minima</code> <a href="https://github.com/jekyll/minima">jekyll theme</a></p>

<p>Clone your repo locally and copy over your generated markdown files and images to the <code>_posts</code> directory.</p>

<p>From there you can modify the theme, or if you’re handy about it, use another theme. I’ll probably tinker with this one over time but for now it’s pretty much Minima with some css overides to add background and modify some other elements. Developer mode in whatever browser you use (I use Safari) is super handy for tweaking rather than trying to edit css, publish, wait for github actions to generate the pages, realise you missed something, rinse and repeat.</p>

<h3 id="the-future">The Future</h3>

<p>This makes adding a new post as easy as creating a new file in <code>YYYY-MM-DD-post-title.md</code> format and then editing as I see fit. When I’m ready I can commit and push the changes.</p>

<p>I also have to go over the older posts and do some minor edits as not all the images are displaying but that’s something I’ll use as inspiration to make future posts and perhaps fill in the blanks from the past year or so to add some “new old stock” posts about things that have happened the last time I posted something.</p>

<p>Happy Blogging 🙂</p>]]></content><author><name>Bart Reardon</name></author><category term="Meta" /><summary type="html"><![CDATA[🎉 First Post At least a first post hosted on github.io (for as long as the .io TLD still exists) Every other post on this site was migrated over from wordpress. Issues over there as well as the fact that I created this github.io 3 years ago with the intention of using it make for a good time to do this.]]></summary></entry><entry><title type="html">MDOYVR</title><link href="https://bartreardon.github.io/2024/06/21/mdoyvr.html" rel="alternate" type="text/html" title="MDOYVR" /><published>2024-06-21T00:00:00+00:00</published><updated>2024-06-21T00:00:00+00:00</updated><id>https://bartreardon.github.io/2024/06/21/mdoyvr</id><content type="html" xml:base="https://bartreardon.github.io/2024/06/21/mdoyvr.html"><![CDATA[<p>In June 2024, I attended the <a href="https://mdoyvr.com">MDOYVR</a> conference in Vancouver.</p>

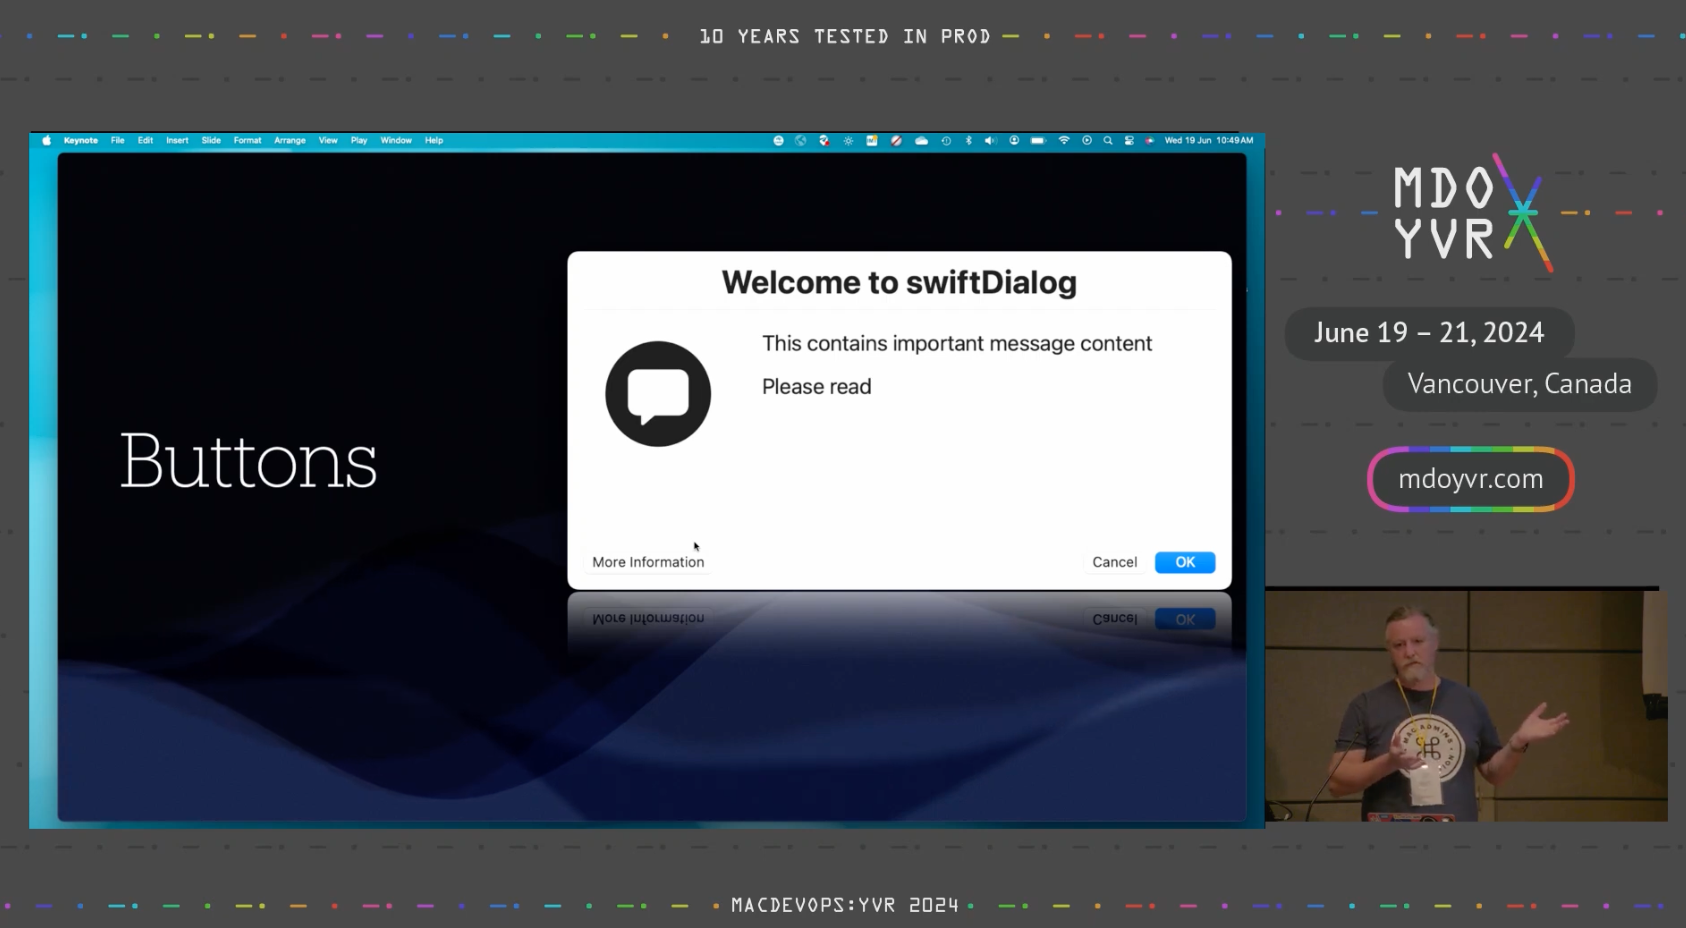
<p>I rarely get the chance to attend converences outside Australia so this was a great opportunity to meet some of the people I’ve only ever interacted with online. I also got to speak about swiftDialog and Outset.</p>

<!--more-->

<p>Mat X and team did a great job on the event. All the videos are up on youtube so you can check them out on the <a href="https://www.youtube.com/@MDOYVR">MDO channel</a></p>

<p>Here’s my presentations:</p>

<h4 id="swiftdialog-workshop">swiftDialog workshop</h4>

<p><a href="https://www.youtube.com/watch?v=dZgmmQbTTdg"><img src="/images/mdo_workshop.png" class="image-rounded" width="200" /></a></p>

<h4 id="swiftdialog-open-source-journey">swiftDialog Open Source Journey</h4>

<p><a href="https://www.youtube.com/watch?v=TE8hJTgjQ3A"><img src="/images/mdo_swiftdialog.png" class="image-rounded" width="200" /></a></p>

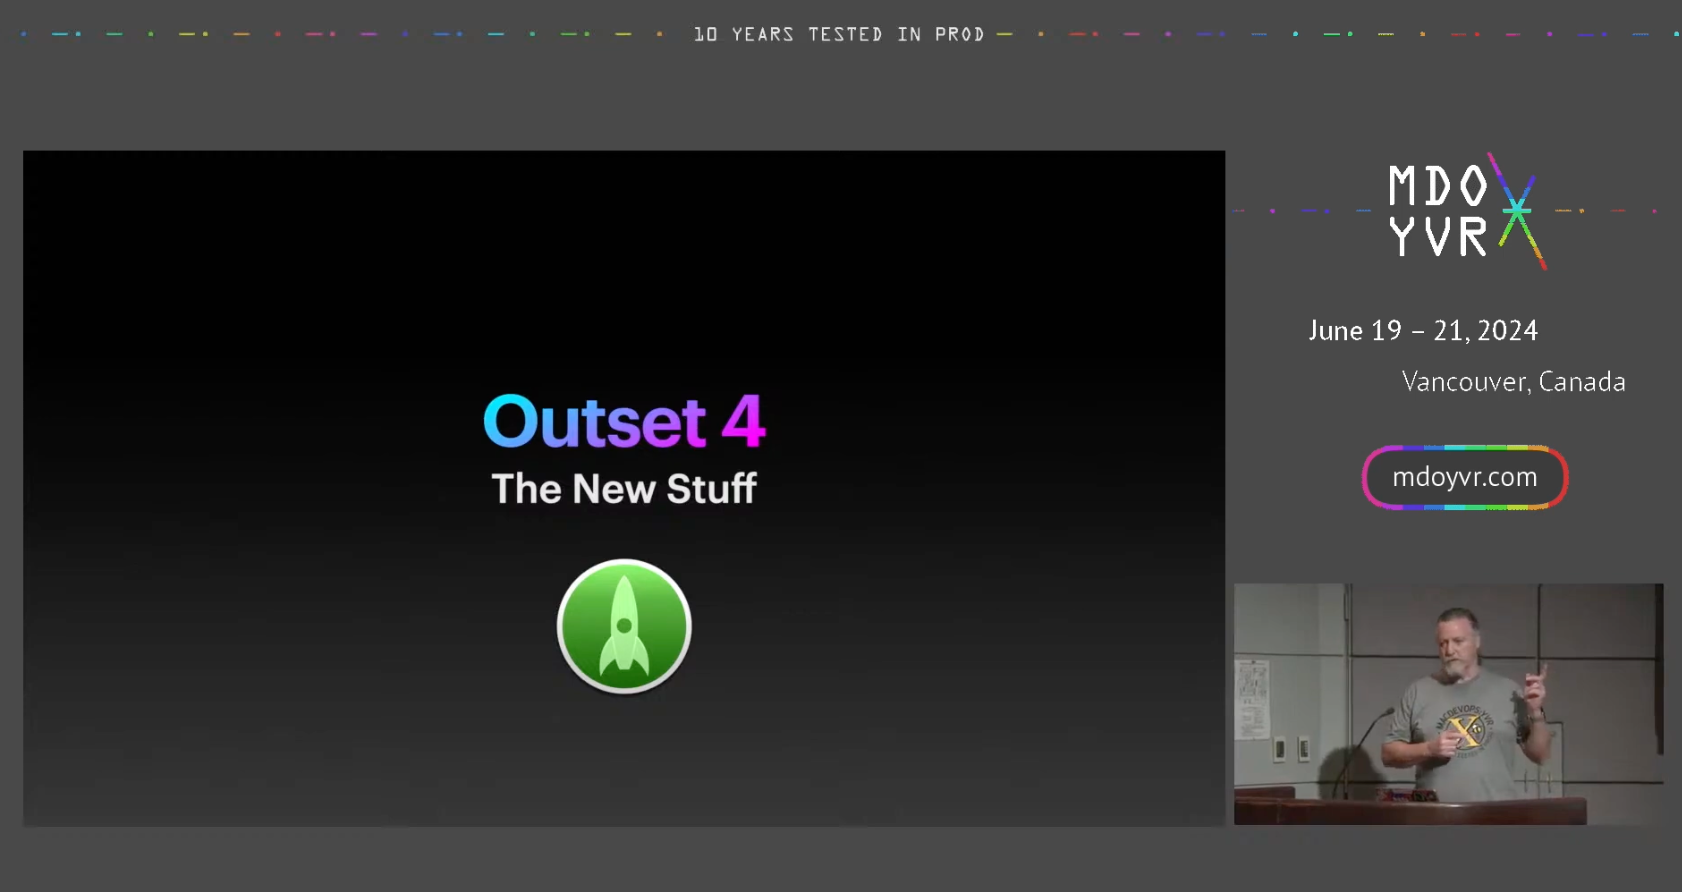
<h4 id="outset-4---the-new-stuff-quick-talk">Outset 4 - The New Stuff (Quick Talk)</h4>

<p><a href="https://www.youtube.com/watch?v=ex5JyO_V2l0"><img src="/images/mdo_outset.png" class="image-rounded" width="200" /></a></p>

<p>Looking forward to the next time I can attend in person 🙂</p>]]></content><author><name>Bart Reardon</name></author><category term="Conference" /><summary type="html"><![CDATA[In June 2024, I attended the MDOYVR conference in Vancouver. I rarely get the chance to attend converences outside Australia so this was a great opportunity to meet some of the people I’ve only ever interacted with online. I also got to speak about swiftDialog and Outset.]]></summary></entry><entry><title type="html">X World Melbourne 2024</title><link href="https://bartreardon.github.io/2024/05/10/x-world-melbourne-2024.html" rel="alternate" type="text/html" title="X World Melbourne 2024" /><published>2024-05-10T00:00:00+00:00</published><updated>2024-05-10T00:00:00+00:00</updated><id>https://bartreardon.github.io/2024/05/10/x-world-melbourne-2024</id><content type="html" xml:base="https://bartreardon.github.io/2024/05/10/x-world-melbourne-2024.html"><![CDATA[<p>Many in the mac admin space make use of open source tools. Whether it’s software like munki, autopkg or eraseinstall or even someone elses script, we rely on the shared work of others to get our jobs done.</p>

<!--more-->

<p>In May 2024, I spoke at <a href="https://auc.edu.au/xworld/about/">X World Melbourne</a> about the journey of creating and maintaining open source software. I was also able to give a workshop on how macadmins can get started using swiftDialog. This was the first time I had given a workshop and it was a great experience with some great feedback. This wasn’t recorded for X World but I did give the same workshop at the <a href="https://mdoyvr.com">MacDevOpsYVR</a> conference in Vancouver in June which was recorded and is available on the <a href="https://www.youtube.com/@MDOYVR">MDO youtube channel</a>.</p>

<h3 id="so-you-want-to-make-an-open-source-app">So You Want to Make an Open Source App</h3>

<blockquote>
  <p>This talk is for those that are thinking about releasing their work as open source or anyone that wants to know what goes in to creating and supporting free software.</p>

  <p>I’ll go over topics from creating something from scratch, taking over an existing project or even contributing to someone elses work. I’ll then look at options for publishing your work, what licenses are in use, getting access to resources like Macadmins Opensource (https://macadmins.io). Lastly I’ll look at the realities of ongoing maintenance, what to expect, how to interact with your customers, how, as a customer, to interact with developers and other highs and lows of running an open source project.</p>
</blockquote>

<p>Watch here <a href="https://youtu.be/_4YrNhhmmIM"><img src="/images/playonyoutube.png" height="30px" /></a></p>]]></content><author><name>Bart Reardon</name></author><category term="Conference" /><summary type="html"><![CDATA[Many in the mac admin space make use of open source tools. Whether it’s software like munki, autopkg or eraseinstall or even someone elses script, we rely on the shared work of others to get our jobs done.]]></summary></entry><entry><title type="html">X World Melbourne 2023</title><link href="https://bartreardon.github.io/2023/03/31/x-world-melbourne-2023.html" rel="alternate" type="text/html" title="X World Melbourne 2023" /><published>2023-03-31T00:00:00+00:00</published><updated>2023-03-31T00:00:00+00:00</updated><id>https://bartreardon.github.io/2023/03/31/x-world-melbourne-2023</id><content type="html" xml:base="https://bartreardon.github.io/2023/03/31/x-world-melbourne-2023.html"><![CDATA[<p>Video of my talk at X World Melbourne 2023 on what’s new in swiftDialog 2</p>

<!--more-->

<blockquote>
  <p>swiftDialog is an open source admin utility app for macOS 11+ written in SwiftUI to allow bash or python (or other) scripts to display popup dialogs, provide user interaction and other workflows.</p>

  <p>This talk will go through what swiftDialog is as an introduction to newcomers as well as go over some of the new features present in swiftDialog 2 and finish off with some demonstration workflows and Q and A if time allows.</p>
</blockquote>

<p>Watch here <a href="https://youtu.be/JeJ-5mKaTpU"><img src="/images/playonyoutube.png" height="30px" /></a></p>]]></content><author><name>Bart Reardon</name></author><category term="Conference" /><summary type="html"><![CDATA[Video of my talk at X World Melbourne 2023 on what’s new in swiftDialog 2]]></summary></entry></feed>